Ho, Ho, Home: Do-It-Yourself Christmas Ornaments

By DANIELLE BOOTHE
Christmas is considered to be the most joyous and beautiful holiday because all over the world, in December people look forward to decorating their homes and Christmas trees using pepper lights and other ornaments.
The lights and ornaments help to beautify your home during the season, but it can be costly to decorate every year with store-bought ornaments. That’s why we’re sharing some awesome do-it-yourself (DIY) Christmas ornament ideas:
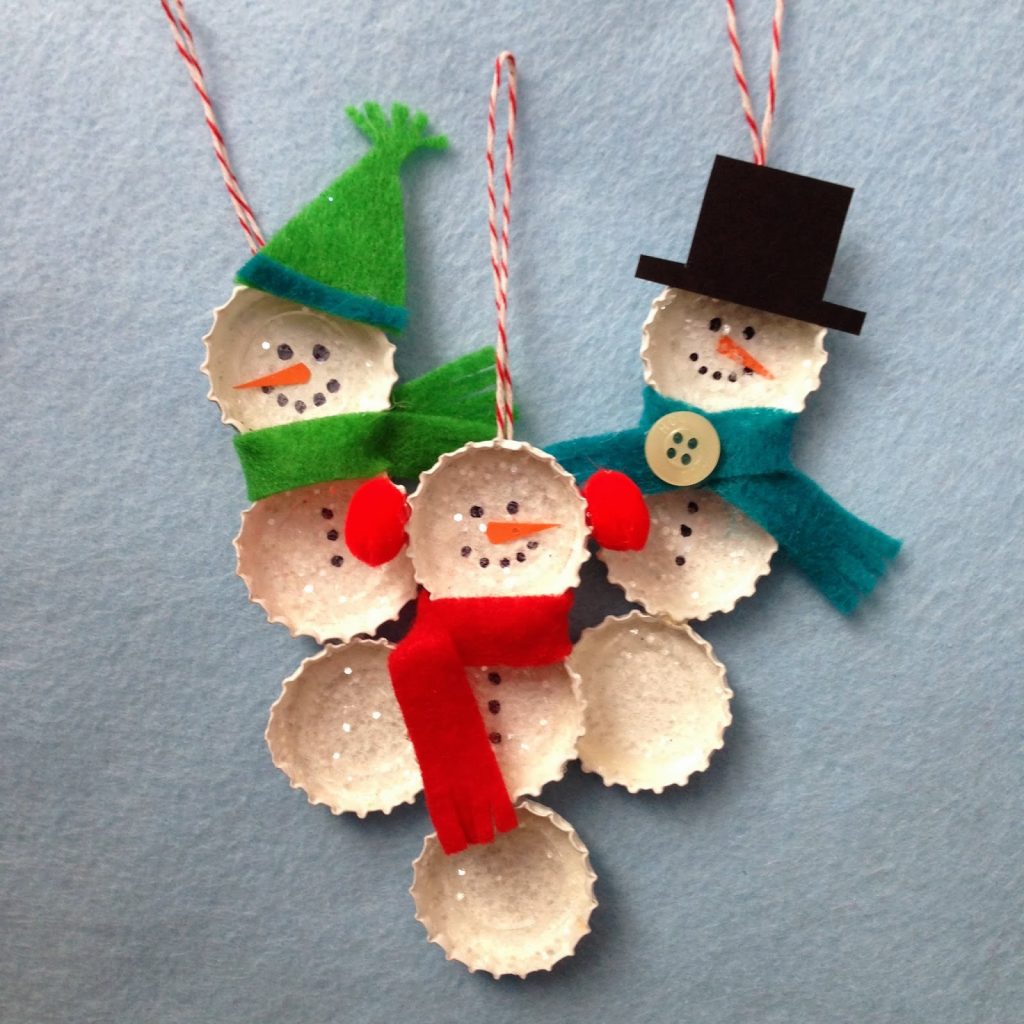
Bottle Cap Snowman Ornament

Materials:
• Bottle caps
• White, black, orange, and red acrylic paint
• Paint brushes
• Ribbon
• Hot glue gun and glue sticks
• Buttons
• Scissors
• Glitter and/or sparkle Mod Podge (optional)
Method:
1. Paint the inside of the bottle caps white.
2. Glue 3 bottle caps to 5″ of ribbon.
3. Put glue between caps to hold them together.
4. Form a loop with the end of the ribbon and glue it in place.
5. Use the paintbrush to paint on eyes, a nose, mouth and buttons on the snowmen – using black paint for eyes and mouth, orange paint for nose, black or red for buttons.
6. Add glitter or sparkle mod podge to give it some glam.
7. Tie a piece of coloured ribbon between the first and second cap to make a scarf and glue buttons on the ribbon to make an accent.
8. Hang on Christmas tree.
Scrabble Tile Ornament

Materials:
• Scrabble tiles (the letters of whatever word you want it to spell)
• Snow-Tex (snow texture paint)
• Ribbon
• Paper plate
• Felt
• Pen
• White craft glue
Method:
1. On top of the paper plate, place the scrabble tiles to spell the words that you want (place the words in the shape of your choice).
2. Use a pen to trace the outline made by the scrabble tiles.
3. Use scissors to cut the outline, cutting the outline a little smaller than highlighted, to prevent the paper plate from showing.
4. Glue each tile to the adjusted paper plate (place something heavy on top of the letters and allow them to dry for 2-3 hours)
5. Apply snow-tex paint at the end of the scrabble tiles to imitate actual snow.
6. Once the paint has dried, attach a ribbon to the back of the tiles to form a loop then glue it down.
7. Cut a piece of felt the same shape and attach to the back of the ornament.
8. Hang on the tree after it has dried completely.
Broken CD’s Ornament

Materials:
• Glass ornament
• CDs
• Scissors
• Hot glue gun and glue sticks
Method:
1. Cut CDs into various small shapes and sizes with scissors.
2. Put a small amount of glue on the ornament then place the CD pieces on it to form a mosaic (ensure that the shiny side of the glass is showing).
3. Continue the step above until the entire ornament is covered (be sure not to place the CD pieces too close to each other, but also not too far apart).
4. Let dry and then place on the Christmas tree.
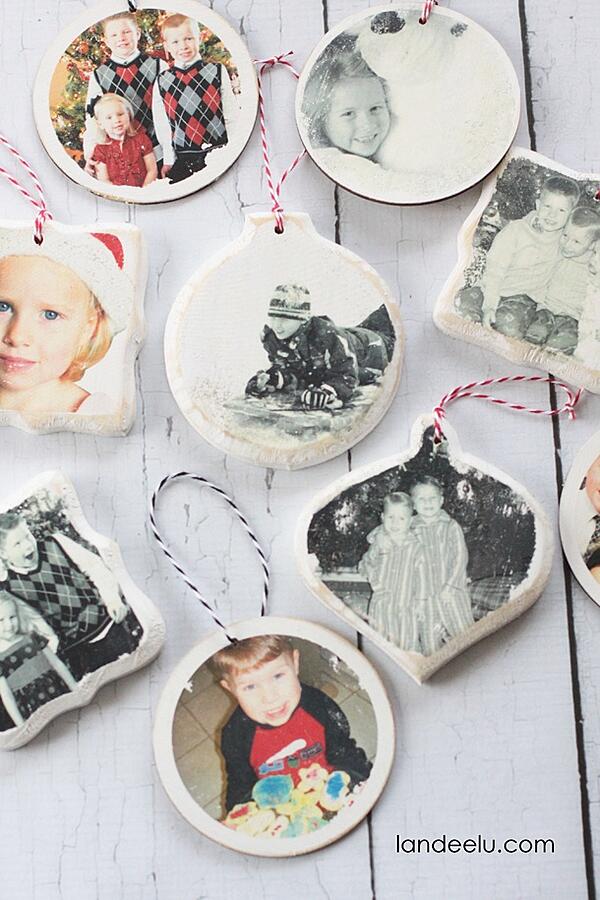
5. Photo-transferred ornament
Photo-transferred ornament

Materials:
• Wooden ornaments
• Matte gel medium
• White craft paint
• Christmas images (has to be printed on a laser printer)
• Foam brushes
• Glitter craft paint (optional)
• Ribbon
Method:
1. Cut photos to the size of the wooden ornaments.
2. Paint your wooden ornaments with white craft paint. Let it dry overnight.
3. Apply matte gel medium to the photo – the side with the image.
4. Place photo on the ornament (ensure that you place it so that the side with the photo is pasted on the ornament).
5. Mist water all over the photo to remove the paper, which should be completely removed. 6. The image from the photo will be left on the wooden ornament.
7. Apply glitter paint to the photo to add a little sparkle.
Attach the ribbon to the photo (ensure that it forms a loop, so you can hang it on the tree).
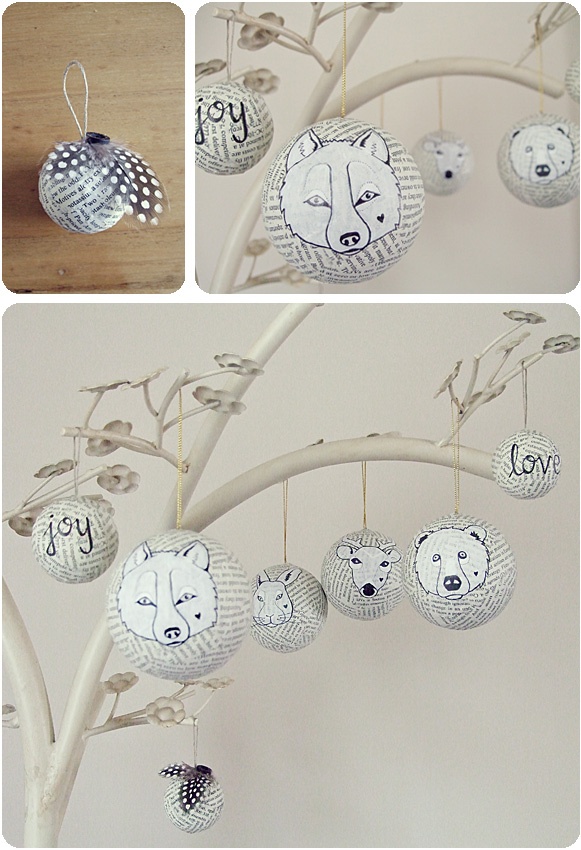
Paper-made ball ornament

Materials:
• Paper (with text)
• Glue (preferably wheat based adhesive)
• Polystyrene balls
• Masking tape
• String
• Pen
• Paint
Method:
1. Rip up the paper in different sizes and shapes.
2. Apply glue to the polystyrene ball, then apply ripped paper. Repeat this step until the ball is completely covered.
3. Use pen and/or paint to add text and images to the ball.
4. Use masking tape to apply and hold in place the string to the ball.
5. Hang on Christmas tree.
For more tips on how to save during the festive season, check out or blog, Six Ways to Save For the Holidays!
